Assembly Instructions
The Shift Register breakout board comes without headers soldered on, and requires some assembly before use.
Requirements
To solder this kit, you will need:
- A soldering iron
- Solder
- A wire cutter (a diagonal type that allows you to cut the wires as close to the soldering points as possible is best)
- A multimeter
Optional:
- Helping hands or a vise to hold the PCB in place when soldering
- Tweezers to help pull the legs of the components through the holes (an angled tweezer is ideal for this)
- Desoldering wick
- Solder sucker
- Protective glasses
See the equipment page for more details.

The Shift Register Breakout Board comes without pinheaders soldered on. The following instructions are for using it on a breadboard.
Step 1

First, let us solder on the 5-pin female header. It should go on the top of the board, where the shift register ICs are already soldered on.
Insert the header, and then turn the board over to solder. The pin header will not stay in place on its own, so to hold it in place while soldering use a strip of masking tape or clips.
Solder just one pin first, and then check orientation. If orientation is bad, re-apply heat to the solder point and gently nudge the pin header until the placement is good.
Once you are happy with the placement, solder the remaining four points.
Step 2

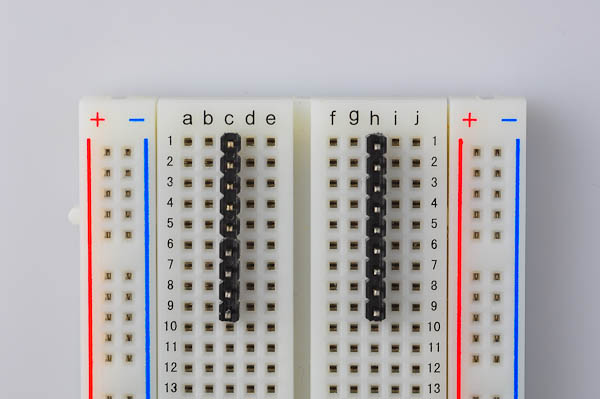
Now break off two rows of 9 pins from the included male pin header strip. The easiest is just to snap them off by hand, but wire clippers can be used as well.
Place the pin strips on a breadboard: Align both on the top row of the breadboard, and two steps out from the middle rail.
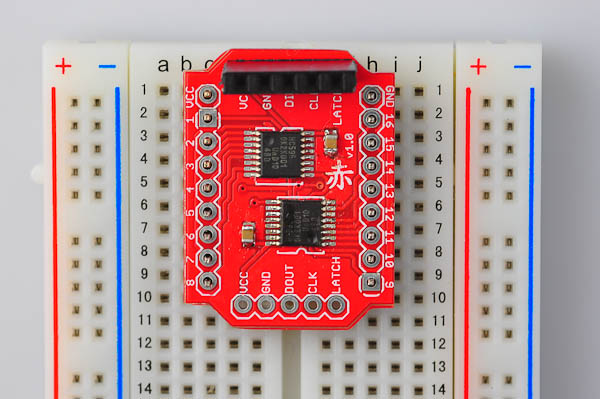
Now place the breakout board on top and press it down so that all pins fit snugly in the holes:

It may be neccesary to add some downward pressure when soldering: Solder the top right and then the bottom left corner: Adjust alignment as neccesary and then finish the other pins.

CONGRATULATIONS: You have now assembled the Shift Register Breakout Board
Head on to null for ideas on how to use the board.